Burns
are an inevitable part of everybody’s lives. An innocent trip to the
kitchen for a quick meal has the potential to result in a severe burn.
This situation is something that most of us will face at least once in
our lifetime.
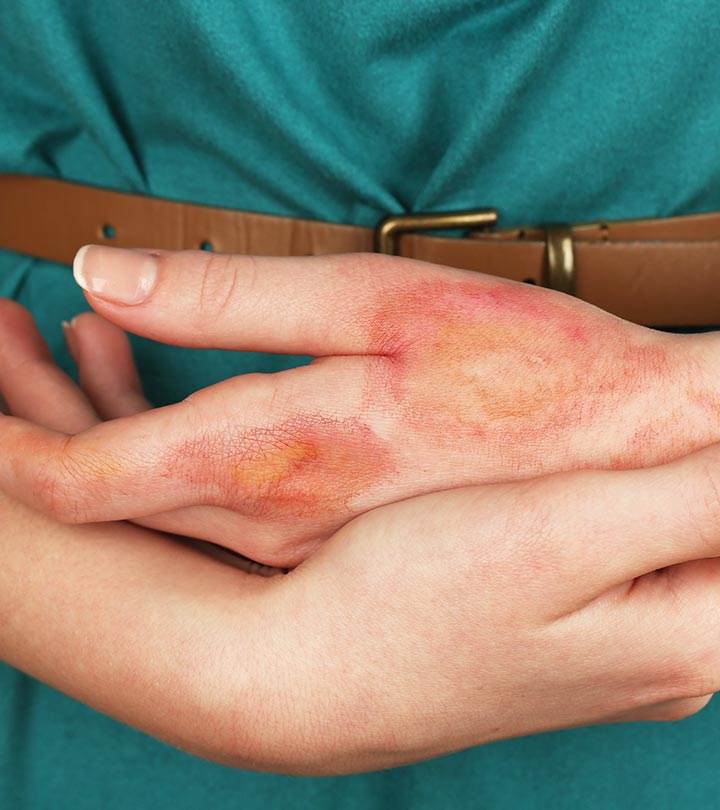
Children are at a higher risk of suffering from burns, owing to their inevitable attraction towards fire. Though some burns are quite harmless and not of much threat, some burns can cause permanent scarring and thus, must be attended to immediately. In this article, we have provided a list of home remedies that will help you treat burns.
But first, let’s look at the types of burns.
Types Of Burns
Depending on the severity and damage, burns are mainly classified into three types.1. First-Degree Burns
The burns that cause the least damage to the skin are called first-degree burns. These burns only affect the outermost layer of the skin and do not cause blisters. The common signs of a first-degree burn include redness, inflammation, and in some cases, slight peeling of the skin.2. Second-Degree Burns
Second-degree burns often go beyond the outermost layer of the skin and cause the skin to blister and become sore. If a blister happens to pop, it gives the burn a wet appearance. Depending on the severity of the blisters, this type of burns takes a longer time to heal.
3. Third-Degree Burns
Third-degree burns affect and extend through all the layers of the skin. These are very severe and often cause nerve damage, which disables one’s ability to feel the pain from the burn. The skin affected by a third-degree burn is either waxy white or dark brown. If left untreated, such burns have the potential to cause severe scarring. Third-degree burns must be attended to by an experienced physician and should not be self-treated.Burns that are extremely severe and extend to the bones and tendons are called fourth-degree burns.
As you must have concluded by now, if you are suffering from something as severe as a third or fourth-degree burn, you must consult your doctor immediately to prevent permanent scarring. These burns also have the potential to cause death, depending on the extent of damage to your body and hence need to be medically attended to immediately. However, if you are suffering from a minor burn that has happened to blister, following some simple and natural home remedies will help you completely recover from your burn.
Best Home Remedies To Treat Burns Naturally
1. Essential Oils
a. Lavender Oil

You Will Need
- 2 to 3 drops of undiluted lavender oil
- Cotton pad
What You Have To Do
Take a few drops of undiluted lavender oil on a cotton pad and spread it evenly on the burned area.How Often You Should Do This
Do this three times a day until you see positive results.Why This Works
Lavender essential oil is widely used for its various medicinal benefits due to its antiseptic nature. The presence of linalyl acetate and beta-caryophyllene gives lavender oil its pain-relieving and anti-inflammatory properties. The combination of these properties of lavender oil helps in healing minor burns and prevents scarring (1).b. Peppermint Oil

You Will Need
- 2 to 3 drops of peppermint oil
- Cotton pad
What You Have To Do
Take about three drops of peppermint oil on a cotton pad and apply it to your burn.How Often You Should Do This
Do this at least thrice daily.Why This Works
Peppermint oil is rich in menthol, which gives a cooling effect to the burn. In addition, the analgesic and anti-inflammatory properties of peppermint oil can eradicate the pain and swelling accompanying the burn (2).c. Tea Tree Oil

You Will Need
- 2 to 3 drops of tea tree oil
- Cotton pad
What You Have To Do
Take a few drops of tea tree oil on a cotton pad and swipe it evenly on your burn.How Often You Should Do This
You must do this at least twice daily.Why This Works
Tea tree oil is known for its powerful antiseptic, anti-inflammatory, and analgesic properties. These properties make it one of the best and quick treatments for painful burns (3).Caution
If you have sensitive skin, mix tea tree oil with coconut or olive oil before application.d. Frankincense Oil

You Will Need
- 2 to 3 drops of frankincense oil
- Cotton pad
What You Have To Do
Take a few drops of frankincense oil on a cotton pad and apply it directly to the burned area.How Often You Should Do This
You must do this two to three times daily.Why This Works
Frankincense oil is quite popular for its antiseptic and antioxidant properties, which can prevent your burn from getting infected and also help it heal faster (4).2. Yellow Mustard

You Will Need
- 1 tablespoon of yellow mustard
- 1/2 tablespoon of water
What You Have To Do
- Blend the yellow mustard with water to make a fine paste.
- Slather this paste onto the burned skin.
How Often You Should Do This
Do this at least thrice daily.Why This Works
Mustard seeds are rich in a counter-irritant compound called allyl isothiocyanate that can relieve pain and improve blood flow to the affected area (5).3. Aloe Vera

You Will Need
1 teaspoon of aloe vera gelWhat You Have To Do
Apply aloe vera gel to the burned area evenly.How Often You Should Do This
Do this two to three times a day.Why This Works
Aloe vera gel heals burns with its anti-inflammatory and antioxidant properties. It is also antibacterial and therefore, it prevents infection of the wounds, scarring, and blistering (6).Tip
You can either use store-bought aloe vera gel or extract it from aloe vera leaves.4. Honey

You Will Need
2 teaspoons of organic honeyWhat You Have To Do
Take some organic honey and slather it onto the burn.How Often You Should Do This
Do this at least thrice daily.Why This Works
Being a natural antibiotic, honey has a natural pH balance that prevents the burn from becoming infected. Honey also has anti-inflammatory and antioxidant properties and thus helps to heal burns faster (7).5. Toothpaste

You Will Need
White minty toothpasteWhat You Have To Do
- Smear some toothpaste over your burn after running it under cold water.
- Leave this on for 10 to 15 minutes before washing it off.
How Often You Should Do This
Do this once in a day.Why This Works
Toothpaste helps in reducing the pain and soothes the burn due to its minty nature.6. Tea Bags

You Will Need
2 to 3 used tea bagsWhat You Have To Do
- After making tea, keep the used tea bags aside.
- Allow them to cool and apply the wet tea bags on the area of your burn.
- Use a gauze to hold the tea bags in place for 10 to 15 minutes.
How Often You Should Do This
Do this at least twice daily.Why This Works
Tea is rich in tannic acids that help to draw heat from the burned area. Thus, tea bags are capable of relieving pain and the burning sensation (8), (9).7. Baking Soda

You Will Need
- 1 teaspoon of baking soda
- 1/2 to 1 teaspoon of water
What You Have To Do
- Mix the baking soda and water to make a fine paste.
- Apply this baking soda paste directly to the affected area.
- Leave it on for 10 to 15 minutes and then wash it off with water.
How Often You Should Do This
You must follow this regimen two to three times daily.Why This Works
The antiseptic nature of baking soda helps in keeping the burned area infection-free. Baking soda can also help to restore the natural pH balance of your skin and this, in turn, reduces the pain and burning sensation (10).8. Coconut Oil

You Will Need
1 to 2 teaspoons of virgin coconut oilWhat You Have To Do
- Apply virgin coconut oil directly to the affected area with your fingertips.
- Leave it on and allow it to be absorbed into your skin.
How Often You Should Do This
You must follow this remedy at least thrice daily for a speedy recovery.Why This Works
Coconut oil, scientifically termed as Cocos nucifera, can help in skin cell regeneration and can also penetrate into the skin. It is also anti-inflammatory and antioxidant and can help in cooling down the burn and preventing blistering and scarring of the burned skin (11), (12).9. Vitamin E Oil

You Will Need
1 teaspoon of vitamin E oilWhat You Have To Do
- Extract vitamin E oil from the capsules and apply it evenly onto the burned area.
- Leave it on until it is completely absorbed by the skin.
How Often You Should Do This
You must do this three to four times daily.Why This Works
Vitamin E is well known and widely used for its various skin benefits. The antioxidant properties of vitamin E oil help in combating inflammation and its skin regeneration abilities can help to heal the burn faster (13).10. Milk

You Will Need
- 1/4 cup of cold milk
- Cotton balls
What You Have To Do
- Soak a cotton ball in refrigerated milk and apply it to the affected area.
- Leave it on for 10 to 15 minutes before washing it off with water.
How Often You Should Do This
You must repeat this every couple of hours until the pain and burning sensation begin to fade.Why This Works
Milk has a high content of zinc and some proteins that can help in soothing and healing burns faster (14).11. Vinegar

You Will Need
- 2 teaspoons of refrigerated vinegar
- 2 teaspoons of water
- Cotton pads
What You Have To Do
- Dilute some refrigerated vinegar with water.
- Soak a cotton pad in the diluted vinegar and apply it to the burned skin.
- Leave it on until the vinegar evaporates on its own.
How Often You Should Do This
Do this 2 to 3 times daily.Why This Works
Vinegar is a natural astringent and antiseptic and is mainly composed of acetic acid. Acetic acid is known for its anti-inflammatory and pain-relieving properties. These properties of vinegar can be beneficial in treating and healing minor burns (15).12. Oats

You Will Need
- 1 tablespoon of oats
- 1 bowl of water
What You Have To Do
- Let the oats steep in the water for some time.
- After a few minutes, you can soak the burned area in this water for 10 to 15 minutes.
How Often You Should Do This
You must do this at least twice daily.Why This Works
Oats are rich in many antioxidants like vitamin E, phytic acids, and avenanthramides. Among these, avenanthramides are found to reduce inflammation. Thus, due to the combined effect of these antioxidants, oats can help to reduce the pain and help your burn heal faster (16).13. Salt

You Will Need
- 1 teaspoon of salt
- Water
What You Have To Do
- Add a few drops of water to salt to make a fine paste.
- Apply this paste to your burn and allow it to dry.
How Often You Should Do This
Follow this remedy several times daily.Why This Works
Salt, also referred to as sodium chloride (NaCl), has natural healing and antimicrobial properties that prevent blistering and help the burn heal faster (17).You must always remember to run cold water on your burn before going ahead with any of these treatments as this will reduce the impact of your burn and prevent it from spreading further. And although you can follow these remedies to treat minor burns right at home, in case of severe burns, you must visit a doctor immediately.
These remedies will surely help your burn heal faster. However, irrespective of that, it is always better to be cautious while dealing with anything that can cause you burns. In certain cases, distractions could even cost you your life. So stay safe and stay healthy. Do you know of any other ways on how to treat a burn naturally at home? Please feel free to tell us by commenting below.
Source Click here
Comments
Post a Comment